Unless you have been living under a rock, you have already heard about ChatGPT and other AI-powered programs. These are quickly changing the internet, and you can even use artificial intelligence in WordPress with plugins like the AI Engine.
AI can be used in a variety of ways in WordPress for things like content generation, filling in metadata, chatbots, and much more. And we are still in the infancy stages of AI as it’s only going to get better over the years.
With this said, while AI can prove very useful, the results may still vary wildly. In some cases, you’ll get very useful results, in others, not so much. It’s definitely a mixed bag, to say the least, but with the right know how it can be useful.
Let’s take a look at how you can use AI in WordPress with the AI Engine plugin.
What is AI Engine for WordPress?
The AI Engine is an all-in-one solution for AI in WordPress. Some of its key features include:
- Creating a chatbot
- Generating content and images
- Recommend titles and post excerpts
- Create an AI copilot to assist you
- Support for multiple AI engines (ChatGPT, DaVinci, and more)
The main purpose of the plugin is to help the user save time by implementing AI to perform certain tasks for your website. For instance, filling out post excerpts is not exactly hard work, but it can eat up time, but not for an AI.
This can help speed up your content creation process and that’s just scratching the surface. Its ability to generate content such as entire posts, or images, can be a great starting point for creating new content.
I say starting point because I would not recommend just allowing the AI to write content for you. AI is still learning, and its writing skills leave a lot to be desired. As such, you’ll still need to go through it and make corrections, and ensure it represents your website.
With that said, let’s get started on covering how the AI Engine can help you.
Installing AI Engine in WordPress
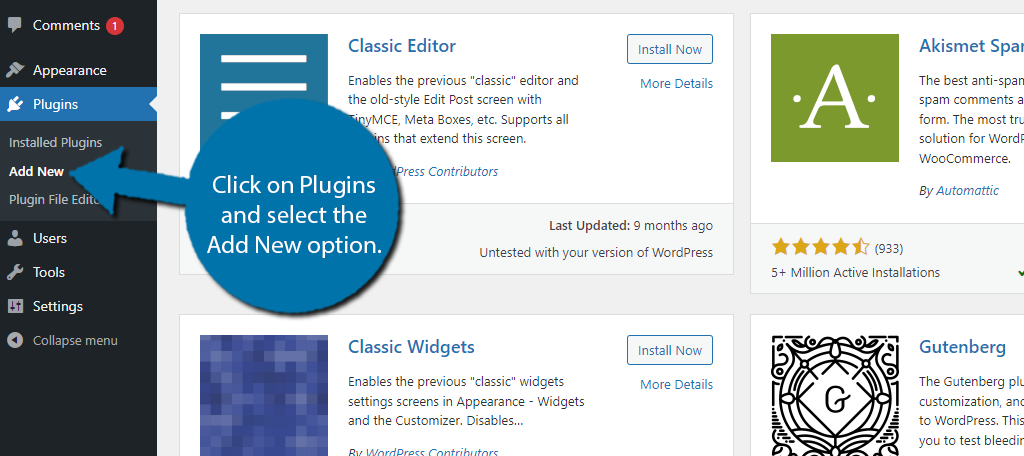
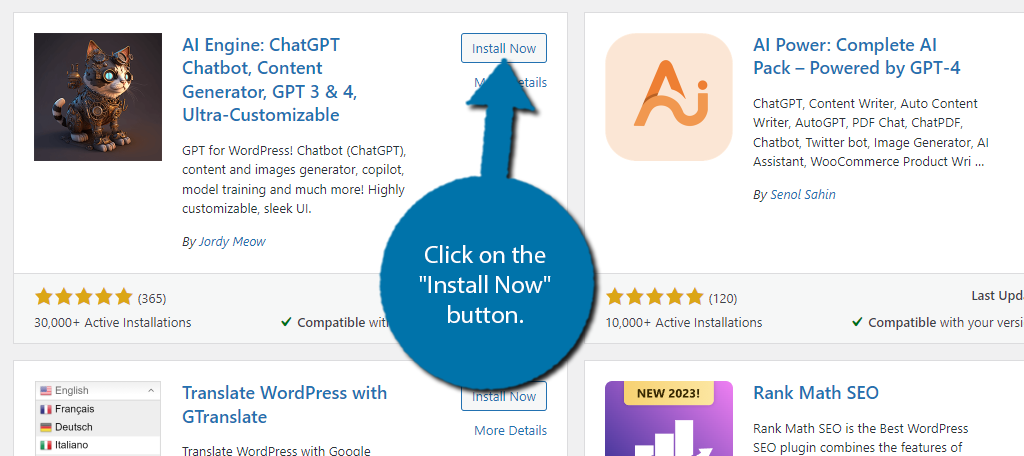
Let’s start by clicking on Plugins and selecting the Add New option on the left-hand admin panel.
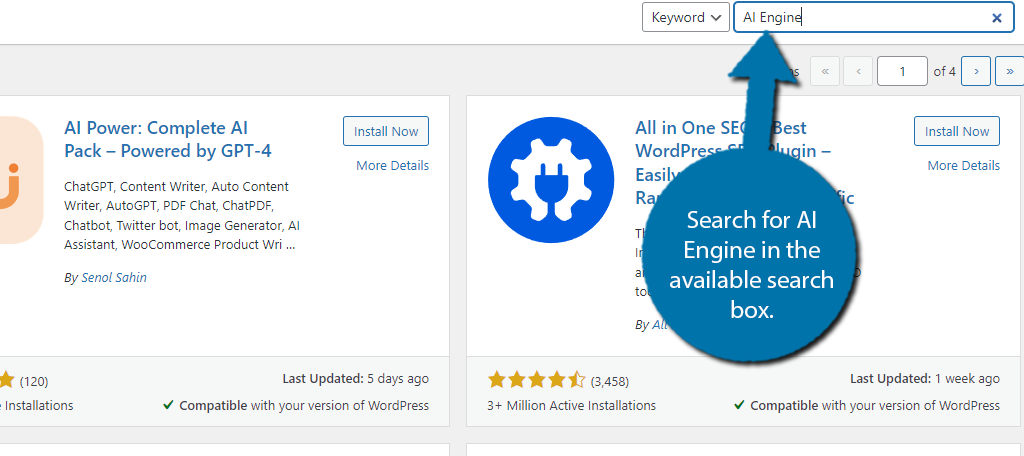
Search for AI Engine in the available search box. This will pull up additional plugins that you may find helpful.
Scroll down until you find the AI Engine plugin and click on the “Install Now” button and activate the plugin for use.
Obtaining An OpenAI API Key
Before you can actually use the plugin, you’ll need to connect it with OpenAI. While you can start using the API for free, it is limited in the amount of content you can generate. If you reach this limit, you will need to pay for further access.
The free limit will be more than enough for you to get a feeling of whether using AI can help your content creation.
Click on Meow Apps and select the AI Engine option.
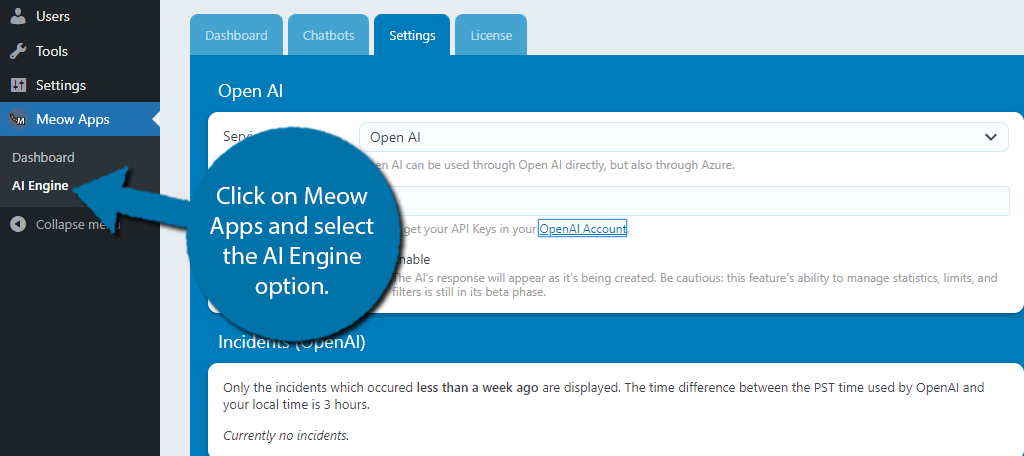
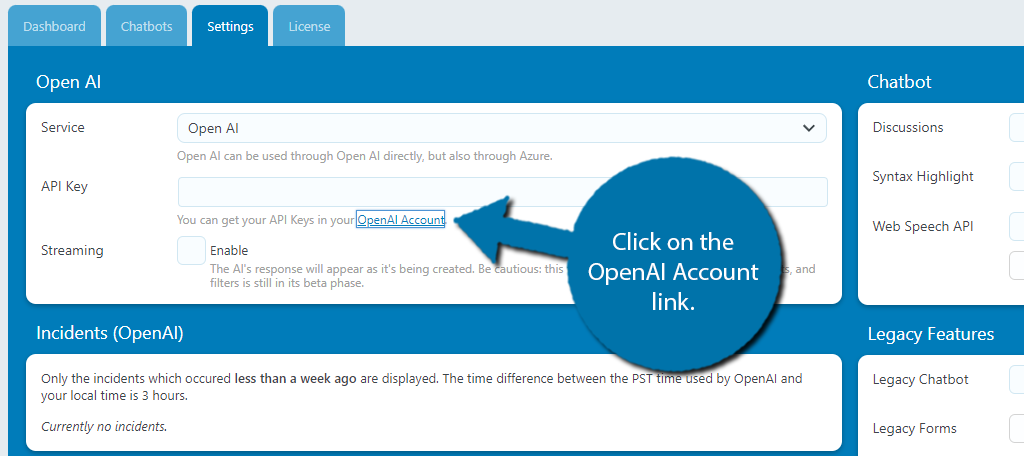
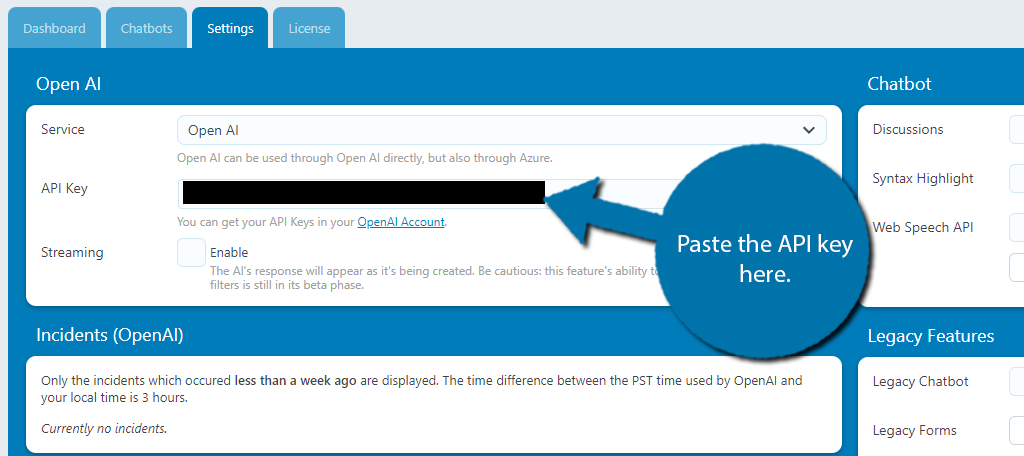
You’ll notice a red message telling you that you need an OpenAI API key. Click on the settings tab, then click on the OpenAI Account link.
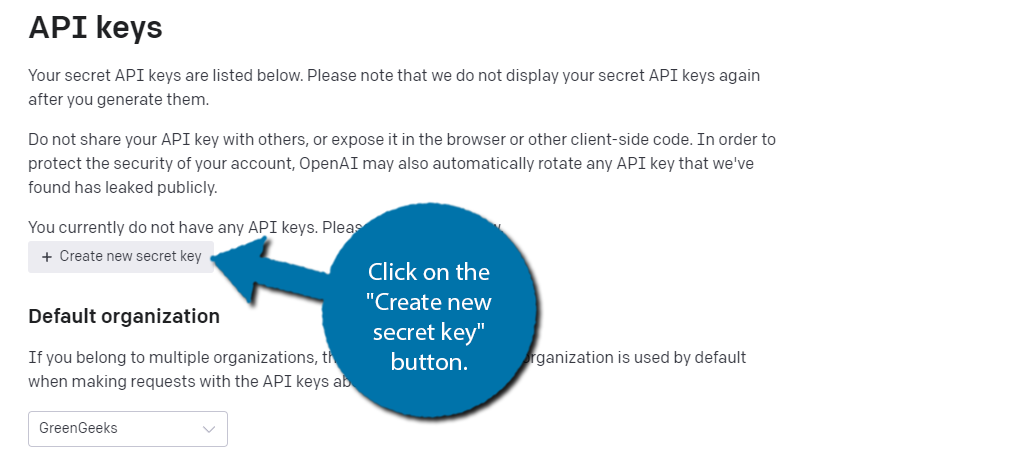
This will open up a new tab where you will be prompted to log in to your OpenAI account or create a new one. Do whichever one applies to you.
When creating an account, you will need a valid email address that must be verified, as well as a phone number.
Once you have created an account, click on the “Create new secret key” button.
You’ll be prompted to enter a name, which doesn’t matter, so enter anything you would like. The API key will now be generated. This key is only visible at this time. You can never see it again, so copy it and store the key in a safe location in case you need it again.
Otherwise, you will need to create a new one. Paste the key in WordPress to complete the plugin setup.
With the API key in place, you are now ready to begin using this plugin, so let’s start with the Gutenberg editor.
Adding Titles And Excerpts
The AI Engine plugin fully integrates with Gutenberg, and you can use it to do quite a lot. Let’s start off with two of the most useful features, title and excerpt recommendations.
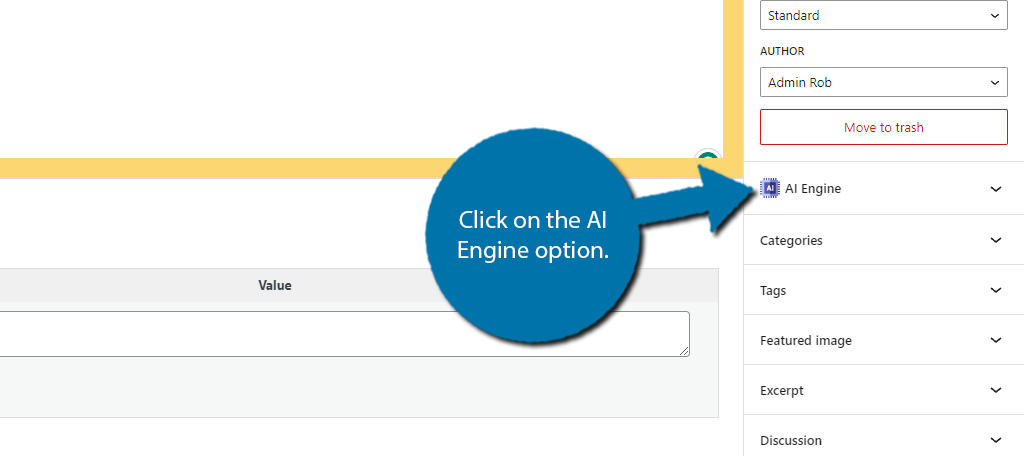
Start by adding some content to the body. The title recommendation is based on what you write in the body of the content. The more you write, the more accurate the results. To find this option, click on the AI Engine option.
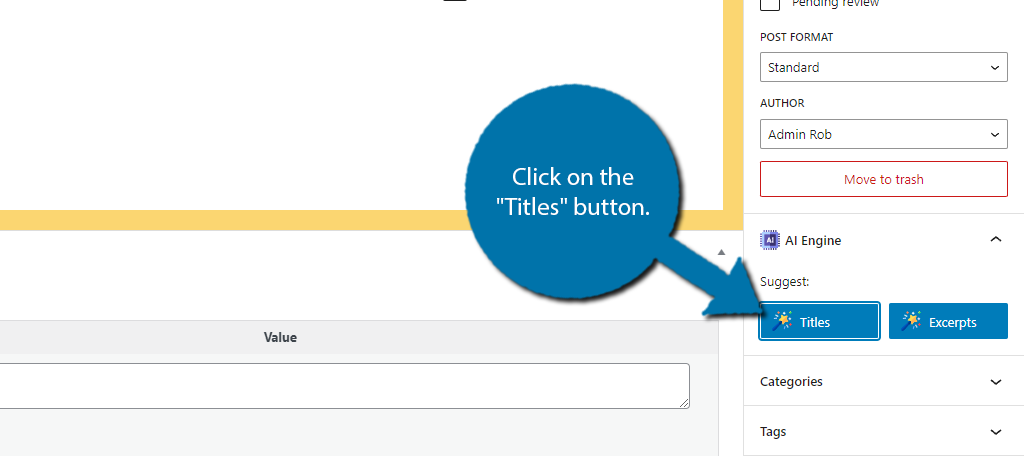
Click on the “Titles” button to generate some titles.
This will pull up recommendations like so:
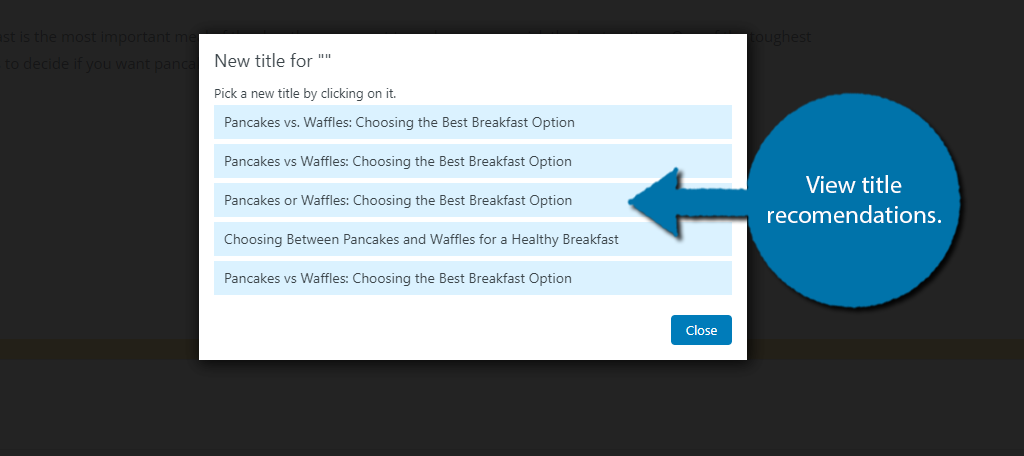
The results are more varied depending on how much you write. As you can see, sometimes the options are nearly identical to each other. If you click on one of them, it will replace your current title.
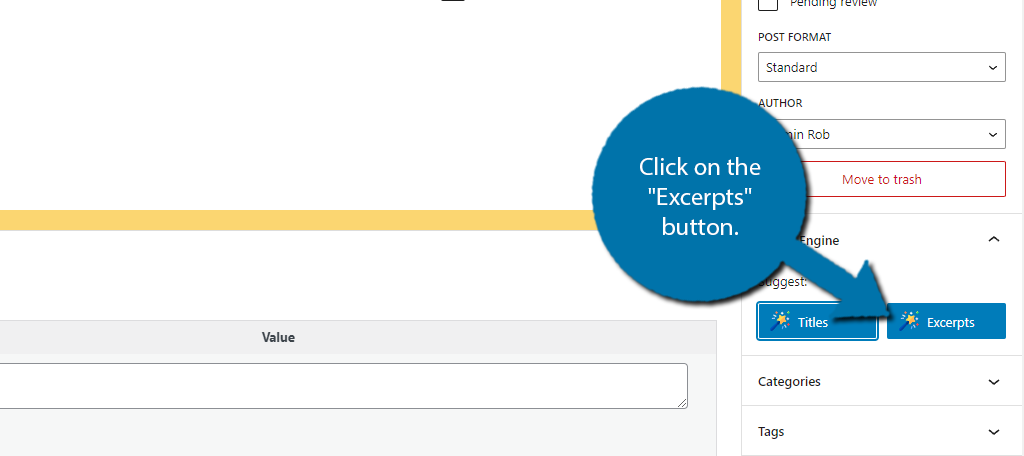
The other option was to generate an excerpt for the content. Click on the “Excerpts” button to do so.
Here are what my results looked like:
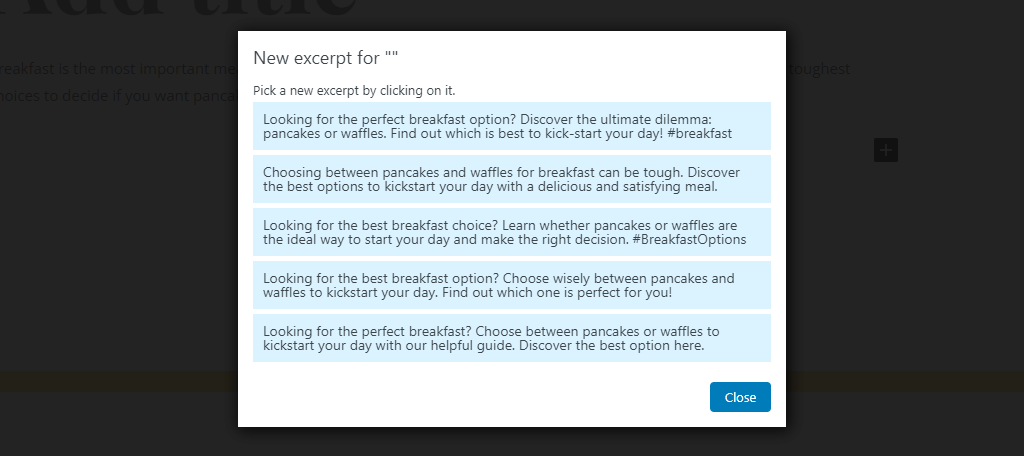
Simply click on one and you’ll add it to the excerpt section. This can save you a lot of time, as many beginners not only forget to create an excerpt but also struggle to come up with one.
Again, be sure to review what you select and make any corrections.
Using AI Engine in Gutenberg
You’ll also find a variety of options in a paragraph block. Here you can choose to check the grammar of the block, enhance the text, make it longer, make it shorter, or translate the text to another language.
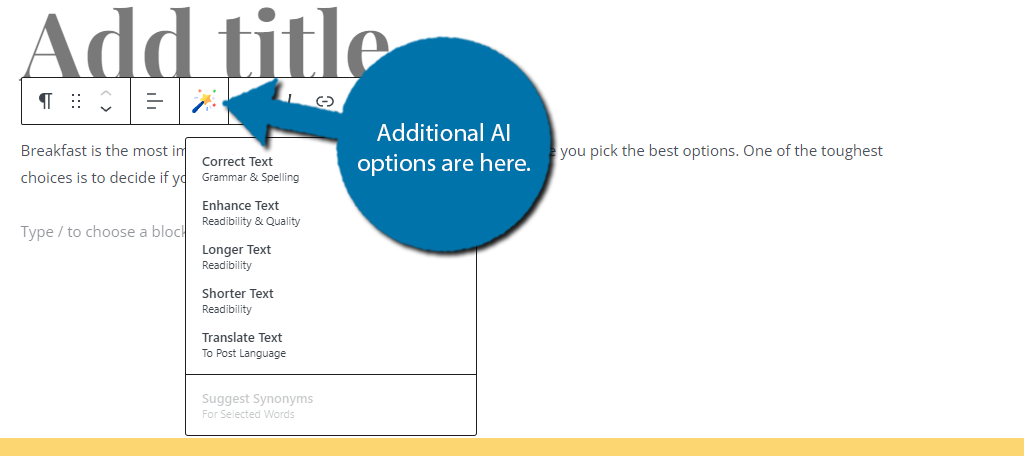
Starting with the Correct Text option, this will scan the text and check for spelling and grammar mistakes. This option does not tell you what is changed or alert you before making a change. For example, I purposely misspelled Waffles as “waffles” and it corrected it.
The Enhance Text option tries to improve the readability of what was written, which often makes it more condensed, but it really depends on the available text.
Thus, this is a bit harder to show off in practice.
The Longer Text option will greatly expand what you have written based on your own research.
Here’s a before and after shot of the Longer text option:
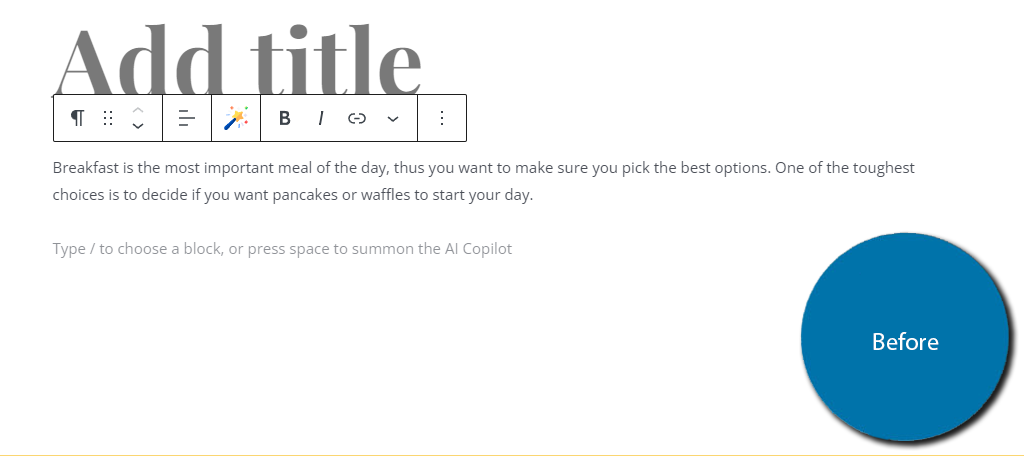
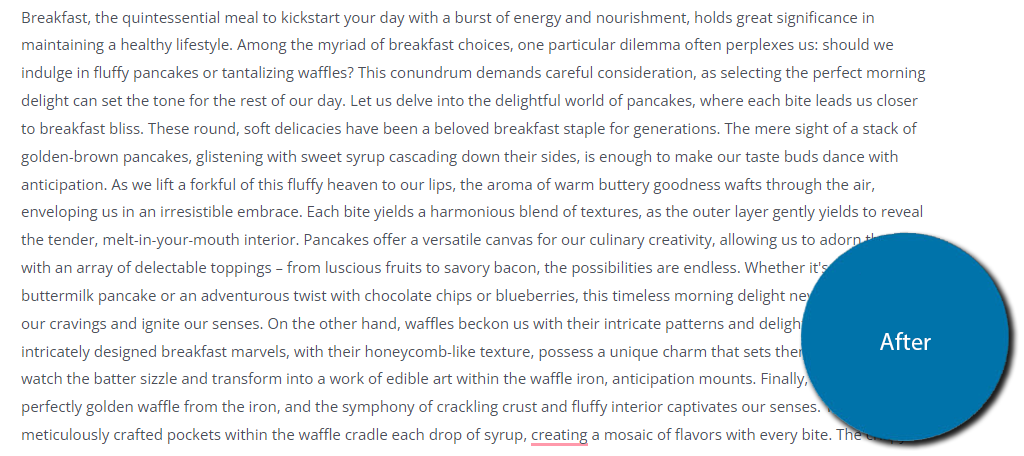
This took 38 words and expanded it to 499 words. Obviously, it is a bit wordy and needs to be edited, but it can be a great resource for finding interesting details you may want to add.
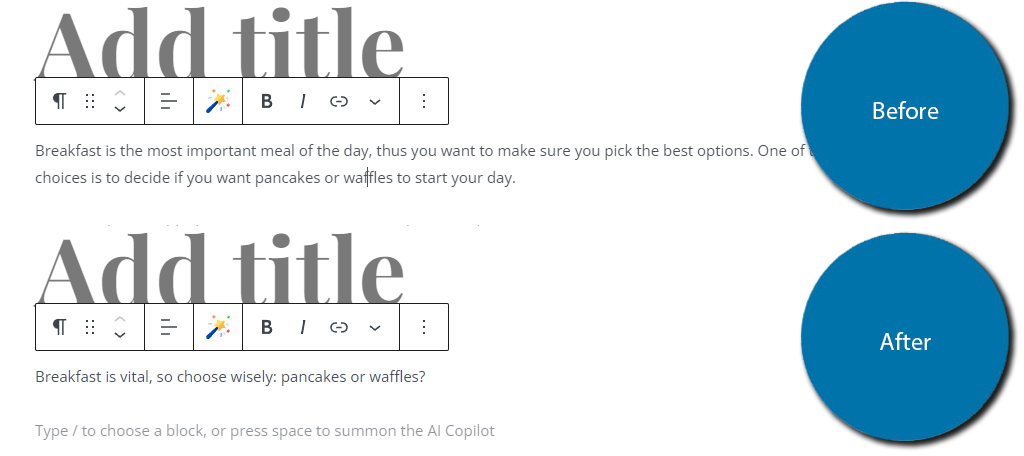
In the opposite direction, the Shorter Text option will do exactly what it says and condense the text. Here are the results:
Another interesting option is the ability to suggest a synonym. This is a great way to improve your vocabulary and find better adjectives to describe a topic. To do this, highlight a word and select the Suggest Synonyms option.
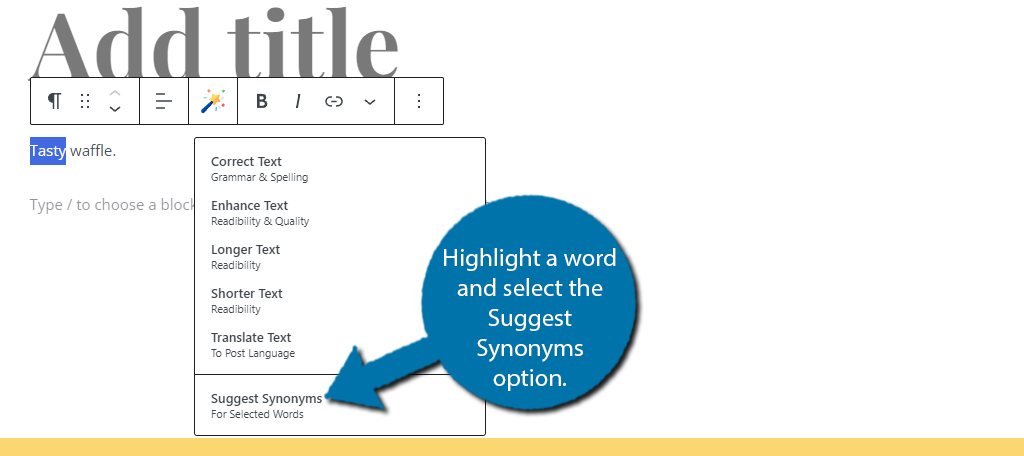
In this case, I highlighted the word tasty, these are my suggestions:
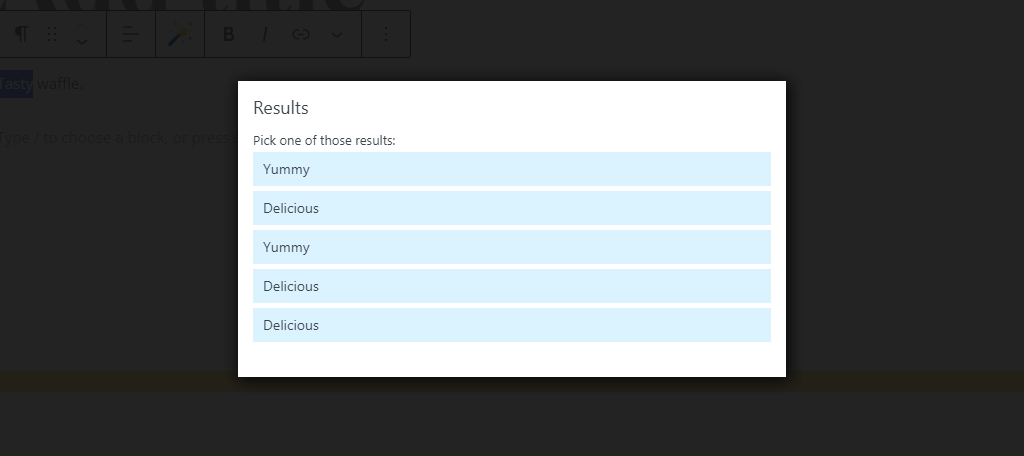
As you can see, the AI will show five results, but it will repeat some of them. It’s a handy tool but still has room for improvement.
Translations
Now you may have noticed that I skipped the translation option, and there is a good reason for this; it is much trickier to use. You see, the translation it creates is based on the language you have selected in WordPress.
Thus, if you tried to translate your text, it actually would just translate your text into the same language, which funny enough, will change some words. Here is a quick breakdown of what you need to do:
- Write the text in the original language
- Go to WordPress Settings and change the site language to the desired one
- Translate your text and save changes
- Revert the language change in WordPress
You should have already typed some text in Gutenberg. Save the changes and click on Settings and select the General option.
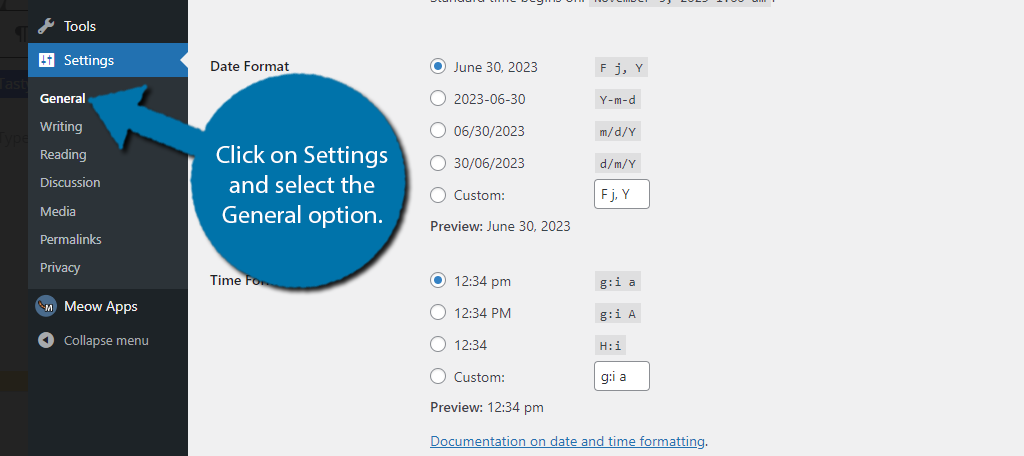
Here you can adjust your core WordPress settings. All you need to do is scroll down and change the Site language option. This will change everything to that native language.
This means all of the menus, options, settings, or anything else in that language.
What it will not change is any of your content that was manually edited. This means any posts, metadata, buttons, or anything you created in the previous language will not be impacted. This will only change stock WordPress options from one language to another.
Be warned, this can make navigating the WordPress menu difficult if you do not understand the language you chose.
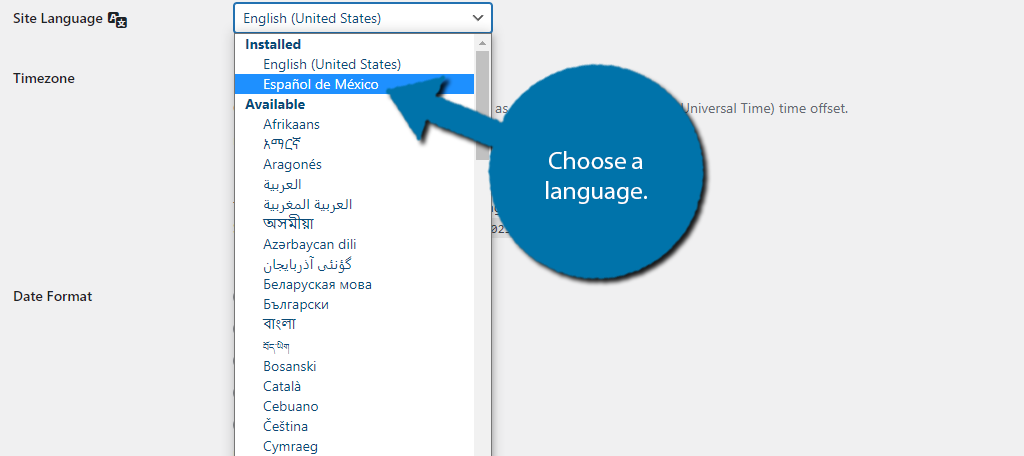
In any case, choose the language you want for the translation. In this case, I am selecting Spanish.
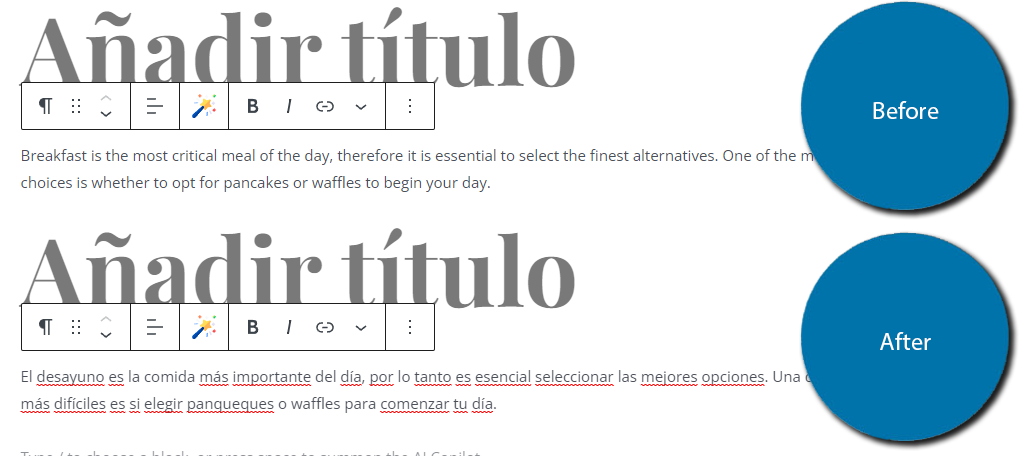
Save the changes and return to the post you wish to translate. You’ll notice the text is still in the original language. Choose the Translate Text option. Here is a before and after of the results:
Then you just need to undo the language change. The process is more tedious than it is difficult, so I recommend using a translation plugin. It’s just easier overall.
Image Generation
One of the most useful parts of this plugin would be the generation of AI images. AI-generated images are not created by humans, therefore, they cannot be copyrighted. This means you can use them on your site without any problems.
It also means that people can use your images on their own blogs and websites without repercussions.
Overall, the process is very simple, you’ll enter what kind of image you want the AI to generate, and it will generate a few images based on your input. Do note that you will have to wait several minutes between each image generation.
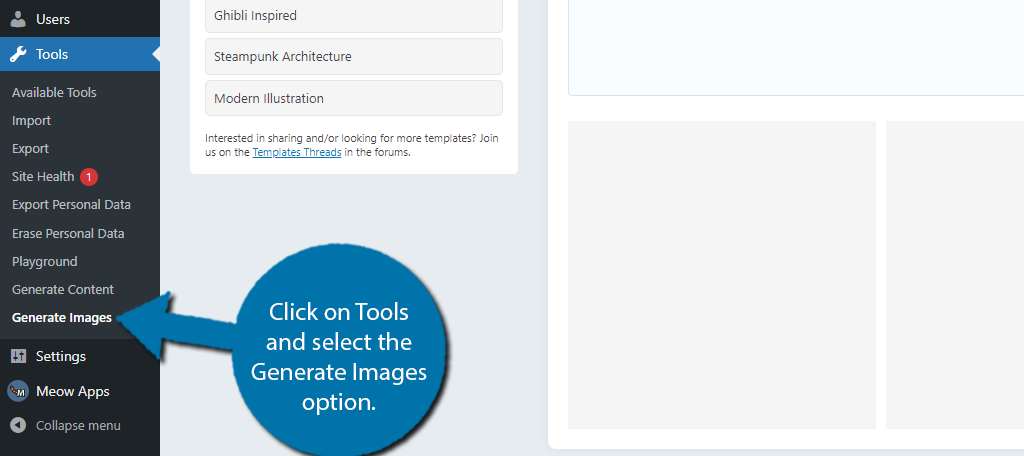
Click on Tools and select the Generate Images option.
You’ll notice a templates section on the left side. The default option is completely blank, while others have certain words already included that make them match that style. Each one is editable, and you can create your own template.
In this case let’s just do something very simple and type “pancakes, waffles” into the appropriate field.
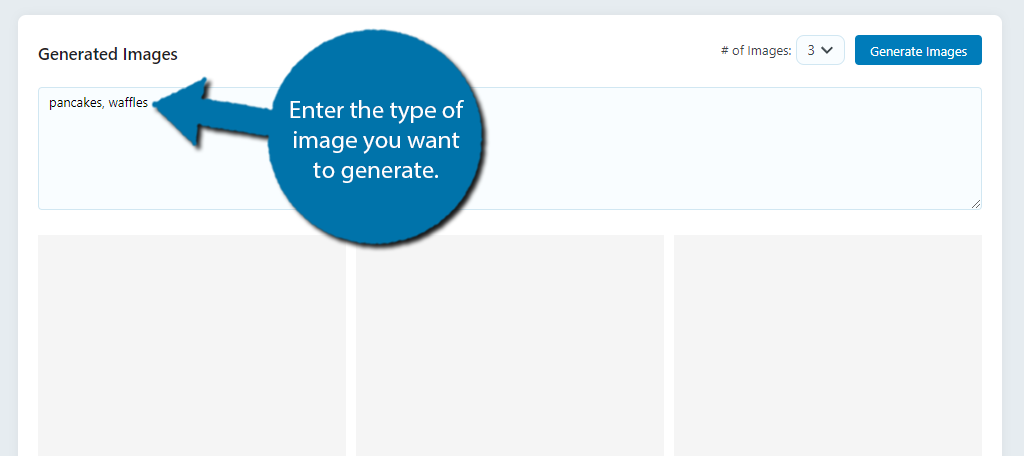
At the top right of this box, you will notice a # of images box that is set to 3. You can choose to produce more images or less, just remember the more you use the AI the more it costs, thus the default 3 is more than enough.
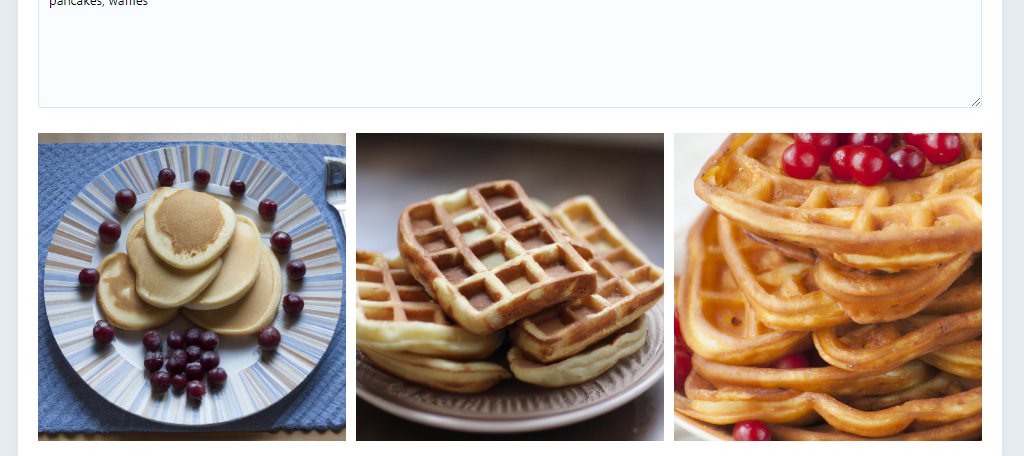
Click on the Generate Images button. Here are my results:
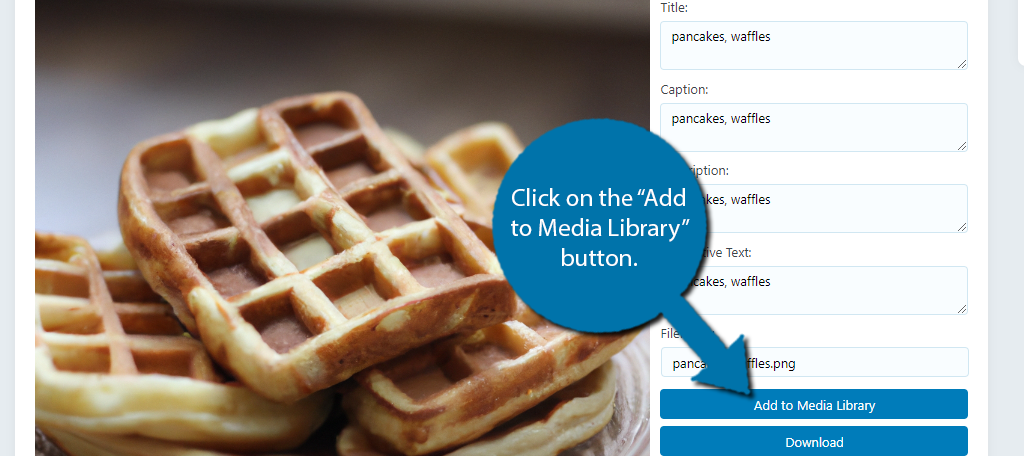
If you like an image, click on it, and you will be able to see all of the metadata, which is already filled in for you, and more importantly, an option to add it to your media library, or alternatively to download it.
Go ahead and add it to your media library.
And that’s really all there is to it. The image is now useable in WordPress wherever you can place images.
Just keep in mind that AI images are not perfect. Sometimes the AI can make some truly horrifying images, or just produce results that are not what you asked for. As such, you are better off keeping things simple.
This can be a much cheaper alternative than having to pay for stock images.
Chatbot Functionality
Many businesses utilize a chatbot to help customers when inquiring about a product or trying to direct them to the correct department (sales, support, etc.). They can be extremely effective and there are a lot of good options in WordPress.
With AI Engine, you can actually train your own Chatbot to interact with users. It’s important to understand that chatbot services have much better options than using this tool for one. Instead, think of this as more of a digital assistant like Siri.
You can ask it questions and get quick responses. What makes this an interesting tool, is that you can tell the chatbot how to behave and configure, which can make it feel like a natural part of your website.
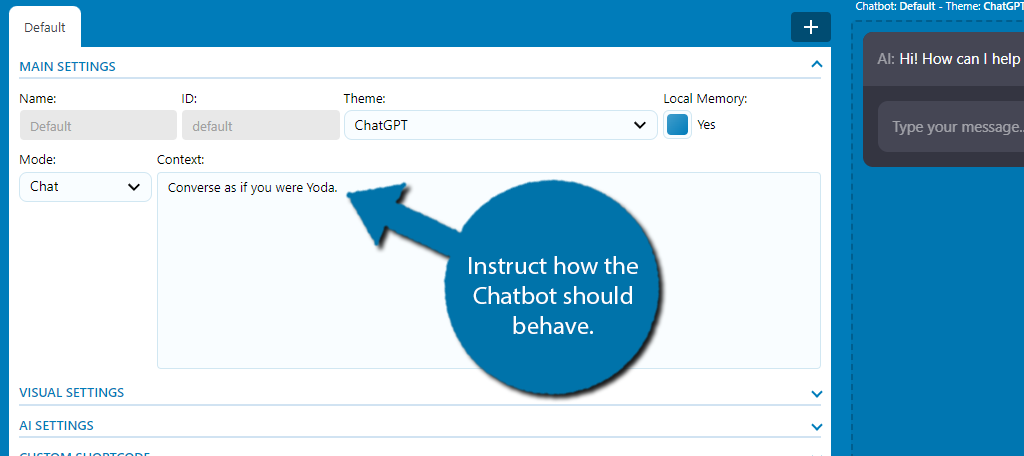
For example, let’s say you have a website dedicated to Star Wars. You could instruct the AI chatbot to be Yoda. Let’s take a look at that.
Click on Meow Apps and select the AI Engine option. Click on the Chatbots tab.
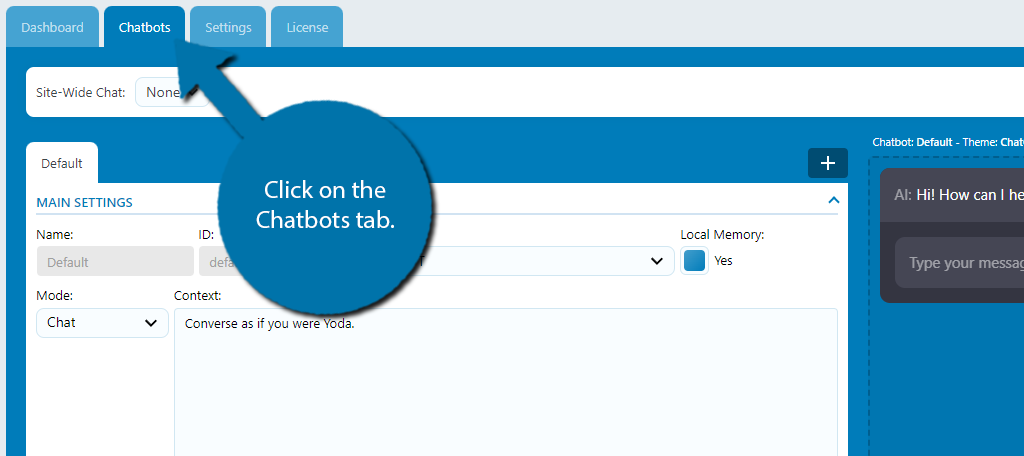
In the context box, tell the chatbot to “Converse as if you were Yoda.” or whatever you would like.
If you then go to the chatbot on the right and type “Hello” you’ll get the results like this:
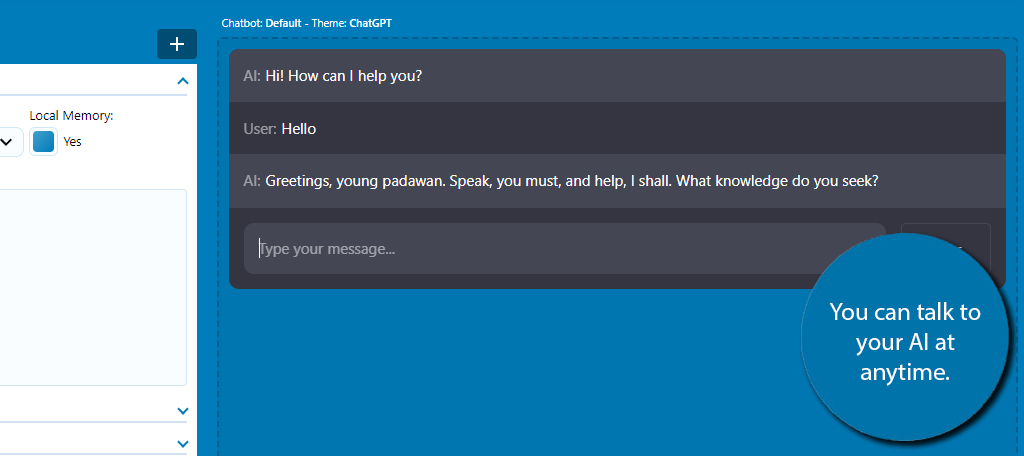
Now I did a fun example, here, but you could make the AI mimic a real person like Elon Musk or a US president. Again, it will be like talking to Siri or any other digital assistant. It will not respond with any profanity or talk about explicit material.
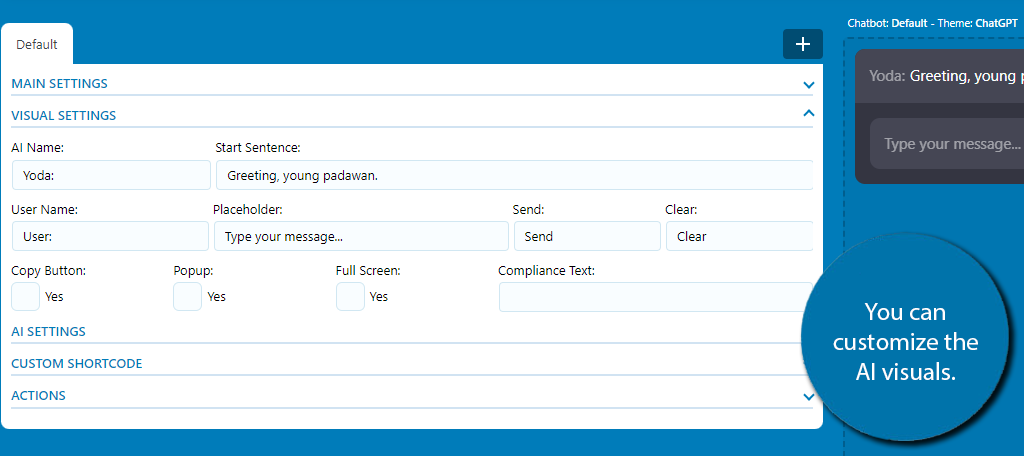
If you click on Visual Settings, you can customize the starting message and name of the AI. In this case, I’ll call it Yoda, and change the starting message to “Greeting, young padawan.” to better reflect the AI persona.
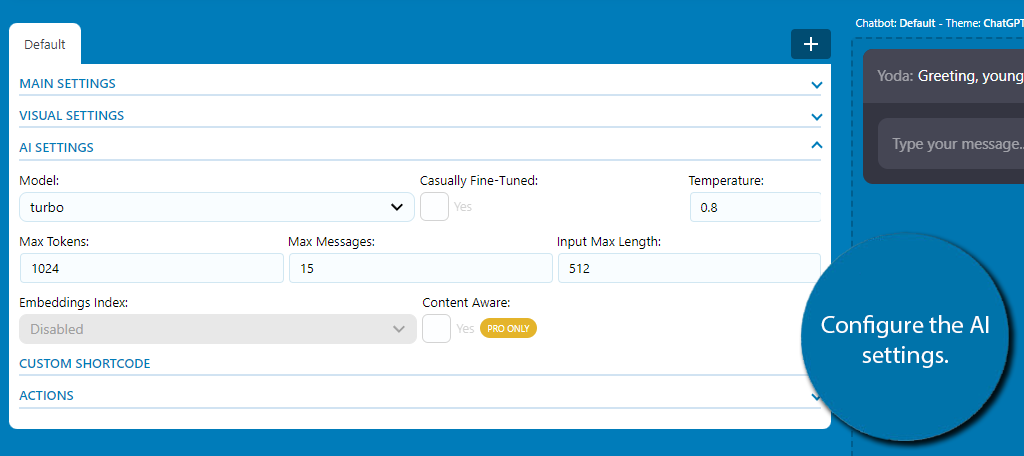
The AI settings allow you to choose what AI model to use, the temperature (level of creativity the AI has), and other settings related to messages produced by the AI.
The custom shortcode section is exactly what you think it is. This is where you can find the shortcode that you can place on your website. It is possible to edit the shortcode and make it something unique, but there is not much reason to do so.
With that, you know the basics of creating a Chatbot with AI Engine.
What Does AI Engine Provide?
As you can see, AI Engine provides a lot to WordPress users. With it, you can generate content and images, create a chatbot, fill out metadata, and much more. It brings a lot to the table with tools that can save you time.
The real question is does it replace dedicated tools or services? No, at least not yet.
AI is still in its infancy, and while the potential is there, you can get some pretty bad results with some of these features. This can be damaging for some businesses, which is why using a dedicated tool is the safer/better option.
Hopefully, this guide gave you a good idea of what this plugin brings to the table and how AI might serve your website.
Do you plan on incorporating AI in WordPress? Will AI change the internet?